How2Setup a bootable Debian distribution for your Raspberry Pi
One of a set of simple easy to use guides for beginners to set up a Raspberry Pi computer.
This SD Card tutorial is my recommended one, if you want to use the recommended
one by the Raspberry Pi Foundation please use 1a but note that this will only write to
SD cards and will not work on some PC's, and the software used in this tutorial will
allow backups of configured Raspberry Pi's so a quick restore can take place.
I luckily work with Windows PC's, Windows Servers and a whole range of Unix versions
plus Networking so i am happy with most systems.
Most people who will be using will probably come from a Microsoft environment especially
school children who the device is aimed at, so i will provide instructions for a
windows user.
PLEASE NOTE:- To use these instructions you will need a PC with internet access, a
4Gb or greater SDCard, and a PC with an SDCard slot.
1. Firstly we need to download the Operating System from Raspberry Pi so
we need to open a browser window and navigate to
http://www.raspberrypi.org/downloads.
2. What we will use for the Operating System on the Pi is the
Debian "Wheezy" Linux Operating
System - this version is suitable for small devices like the Raspberry Pi.
So lets scroll down and click on the 2014-01-07-wheezy-raspbian.zip link - this may have changed
by the time you install your version, so just click the latest zip file.
This will take you to the detailed download page - so again scroll down and click on
one of the "Mirror Servers" preferably one that is in the same country as you are.
Now just save the download to your usual download location and wait for it to finish
downloading.
3. Its finished at last - that took a while. Now navigate in the operating
system to your download folder and double click the zip file and extract to the same
folder as the zip file is in.
You should now see a folder called [2014-01-07-wheezy-raspbian] that has been extracted
- dont forget this name may have changed since these instructions were written.
Now double click on the folder and in it you will see a 2014-01-07-wheezy-raspbian.img
file which is about 1.9Gb in size.
4. We have the image, now we need to install PC software to write this
image to an SDCARD.
So lets download My recommended Writer software is [HDD Raw Copy Tool] from
hddguru.com so open this
link in a new window - and then scroll down to the link Download Windows
Executable (works without installation): and click there to download the program
to your PC
5. Lets run the program - but firstly insert your SD Card in the PC's
card reader slot, then start by double clicking on the program
HDDRawCopy1.02Portable.exe and agree to Security Warning by pressing [Run]
and it will open the following window
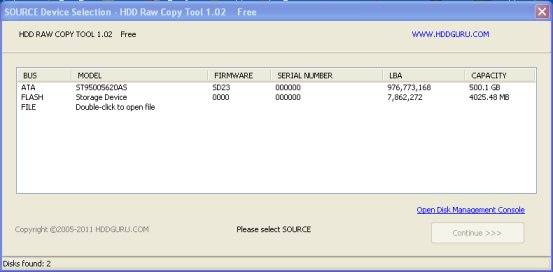
This is the SOURCE image so we need to double click the FILE entry and browse to our
2014-01-07-wheezy-raspbian.img and click [Open] the display
will change to
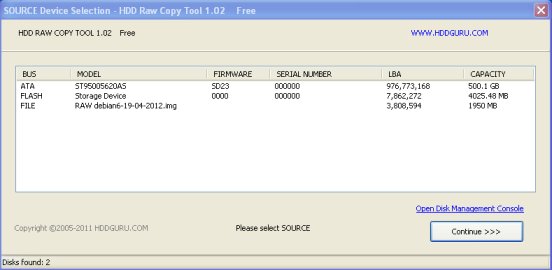
6. Now we need to click on [Continue > > >],
then you should see the following screen.

This is the TARGET screen, so we need to choose the FLASH device then
press the
[Continue > > >] button.
7. You should see the following screen
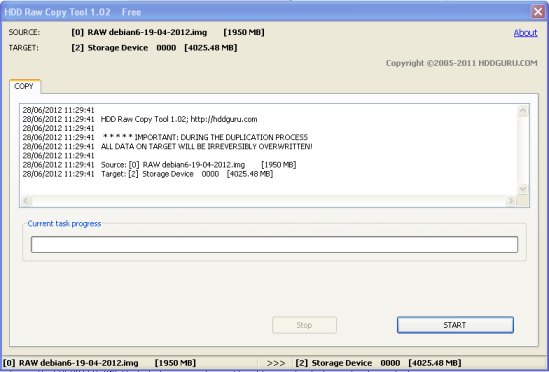
so check that the SOURCE and TARGET are correct and that you are NOT overwriting your
PC's hard drive.
-----------------------------------------------------
28/06/2012 11:29:41 Source: [0] RAW debian6-19-04-2012.img [1950 MB]
28/06/2012 11:29:41 Target: [2] Storage Device 0000 [4025.48 MB]
-----------------------------------------------------
If you are happy with this just press the [Start] button,
the following warning box will open.
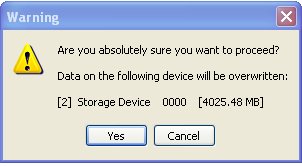
Read the Warning Box and double check you are NOT overwriting your
PC's hard drive. If you are happy with this press [Yes]
and you will see the progress bar moving, and details of the copy in the lower part of
the window
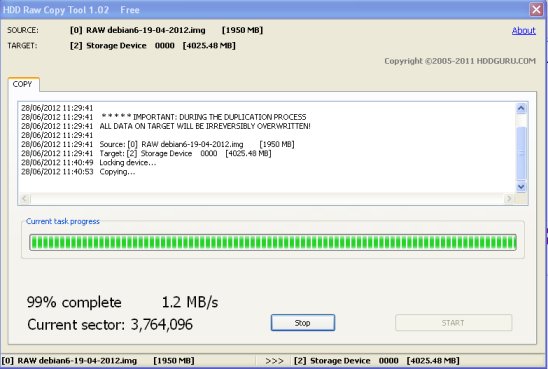
Now just leave this until the [Start] button
is not greyed out, and the [Stop] button disappears, and the
lower display shows 100% complete. Its worth checking for errors in the top part of
the display.
7. You can now close the program and dont forget to eject the SD Card with the image on(If you dont eject you may corrupt the image), then insert it into your Pi.
|
|