How2SetUp Cover my Pi with a Crust - cheap and easy case
One of a set of simple easy to use guides for beginners to set up a Raspberry Pi computer.
This instruction sheet will explain how to make a case for your Raspberry Pi from
cheap plastic boxes, allowing you to stack your Pi's.
I got fed up with my Raspberry Pi
balancing on top of the box it came in, so I decided to make a case as there dont
seem to be many cases available at reasonable prices as yet.
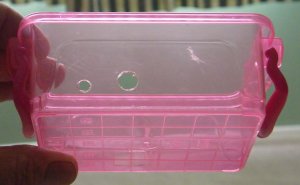
1. You firstly need to purchase a cheap transparent plastic box -
I picked up two from the local Pound store for �1.00 - bargain.
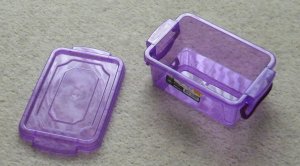 The box dimensions are 2.5ins(6.25 cm)
deep x 3.75in(9.5cm) wide x 2in(4.9cm) high and it comes with a clip on lid. The box dimensions are 2.5ins(6.25 cm)
deep x 3.75in(9.5cm) wide x 2in(4.9cm) high and it comes with a clip on lid.
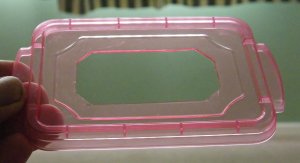
2. the next thing to do is to cut a hole in the lid, I just followed the
pattern on the lid, this allows the pi to cool.
 I found that cutting with a sharp knife with the disposable blades seems to work best.
and allows you to trim more off if you dont cut enough first time.
I found that cutting with a sharp knife with the disposable blades seems to work best.
and allows you to trim more off if you dont cut enough first time.
3. the next thing to do is to cut the two holes for the usb ports and
the network port.
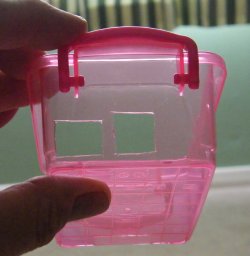
These holes need to be marked out with the pi touching the side of the box where the
HDMI port is as it makes for easier alignment.
As the box is transparent just
mark the plastic with the Pi in it, then remove the Pi for cutting or you may cut
the Pi board.
4. the next thing to do is to cut the holes for the usb power port and
the sdcard.
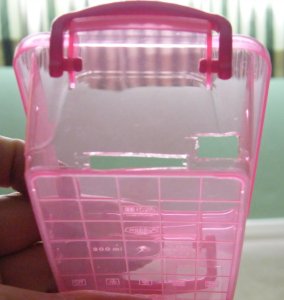
The hole for the SDCARD allows you to lock the Pi into the case, by pushing the
card through the box end. I will explain in the next step.
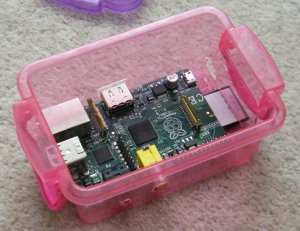
5. Once you have the sdcard hole cut - push the Pi into the box with
the usb port protruding through the usb hole, and the network port flush with
the box side.
6. Now push the sdcard through the hole into the Pi, as you can now see
the Pi is held in place vertically by the USB port and the sdcard, and only a
small amount of polystyrene packing would hold it in place.
7. Make sure the Pi is pushed into the box as far toward the usb side
as you can make it, then mark the positions of the holes for the RCA port, the
sound port and the HDMI port.
8. Now cut these ports.

9. Now just put the Pi in the box and add the sdcard to hold it in place.
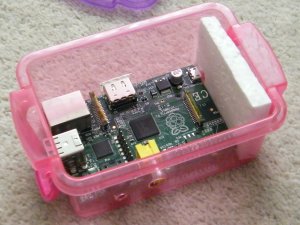
10. Finally just pack the end near the sdcard with a piece of
polystyrene the height of the box, then just clip the lid back on and the
Pi is held quite firmly in its protective crust.
|
|